Adding Design Space Concepts
So far, we constructed a simple LED circuit consisting of a single LED and a single resistor. In the OpenMETA tools, this is referred to as a Design Point. In this section, we’ll modify our simple LED circuit to use a selection of resistors and LEDs in our design by creating a Design Space.
This section of the tuturial builds upon the previous sections, so
you’ll need to use the model that you built. Alternatively, you can open
Walkthrough_LED_part2.xme, which includes all of the work from the
previous sections.
Refactoring a Design Point into a Design Space
We must first convert our component assembly to a design container and then convert each component into a design container.
- Open up SimpleLEDCircuit and make sure nothing in the canvas is selected.
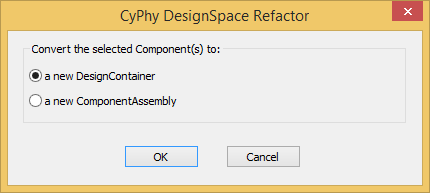
- Click the Design Space Refractorer icon
 .
. - Go to the GME Browser Window and locate and expand the blue NewDS__SimpleLEDCircuit folder.
- Double-click NewDC__SimpleLEDCircuit to open it.

You’ll notice that it looks exactly like your previous component assembly. It has preserved the component names, port names, connections, and layout. However, since we now have a design container, we can begin adding variability to the design space.
Convert Component into Alternative
Starting with the 1k resistor:
- Select Resistor_1k.
- Click the Design Space Refactorer tool, again.
- When prompted, choose to convert the selected Component to a new DesignContainer.
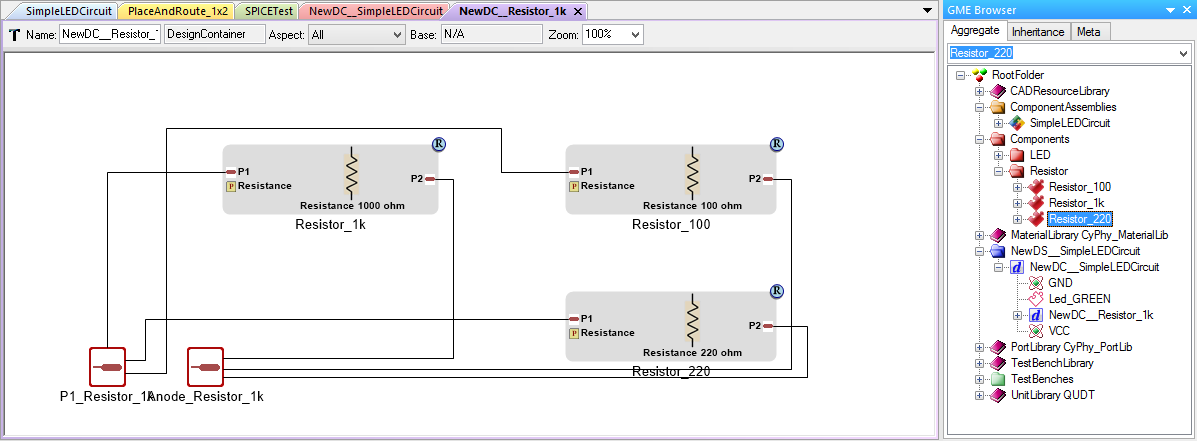
- Double-click the new Design Container that replaced your 1k resistor.
- Drag in references of the other two resistors from the Components folder. See method 1 or 2 in Populate the Component Assembly above.
- Mimic the connections of Resistor_1k so that each resistor in the design space matches the paradigm:
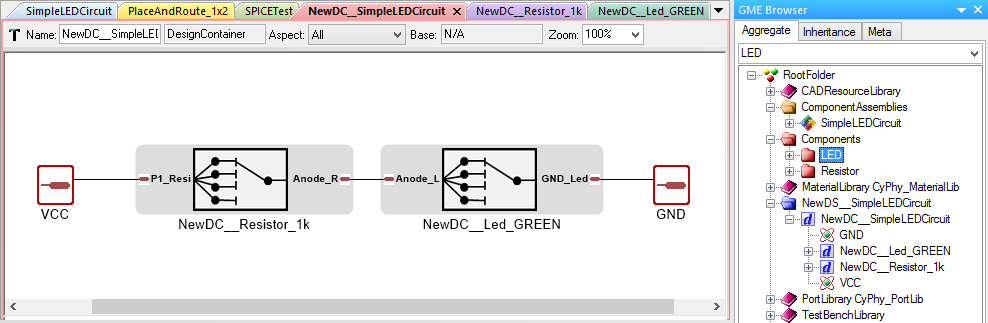
Go back to NewDC__SimpleLEDCircuit and repeat steps 1-6 for Led_GREEN by creating references of the other two LEDs, Blue and Red, inside the design container. When you are done, it should look like this:
Generating Design Points
Since we have three alternative resistors and three alternative LEDs, we can select up to nine configurations.
- Select the Design Space Exploration Tool
 .
. - Click Show CFGs.
- Verify that there are nine configurations and select Export All.
- Click Return to CyPhy.
This process will automatically switch the canvas aspect to Design Space, which
shows the newly exported configurations and the NewDC__Resistor_1k and
NewDC__Led_GREEN Design Containers. Change the canvas aspect back to
All by using the Aspect: dropdown menu at the top of the canvas. The
NewDC__SimpleLEDCircuit Design Container won’t look different, but there
will now be nine simulations (one for each Design Point) the next time you
run a test bench.