Results Browser
The OpenMETA tools enable the generation of large amounts of data through the execution of the various domain models. The amount of analyses results can be further exacerbated with design space modeling and the Parametric Exploration Tool.
To manage and visualize the results of OpenMETA generated analyses, we created the Results Browser and Visualizer, respectively.
The Results Browser provides a layer of management and organization on top of the raw results in the file system. This chapter explains the features of the Results Browser.
Launching the Results Browser
The Results Browser is launched automatically when you initiate an analysis
using the Master Interpreter. It can also be launched at any time using
the Results Browser toolbar button  from within
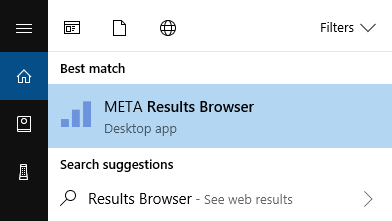
OpenMETA or by searching for Results Browser in the Window Start menu.
from within
OpenMETA or by searching for Results Browser in the Window Start menu.
Toolbar

New Window: This button will open a new instance of the Results Browser.
Select Results Folder: This button allows you to specify a new working directory for the Results Browser. This directory must include at a minimum a ‘results’ folder with some results already generated.
Refresh: This button will force a refresh of the PET Tab and Test Benches Tab results lists. A refresh happens automatically at the conclusion of each active job.
Cleanup: This button cleans up the results/ folder, by moving any untracked
folders from the results/ folder to the _deleted/ folder. If you
want to totally delete old data, you can remove this folder after using
the Cleanup button.
Status Bar
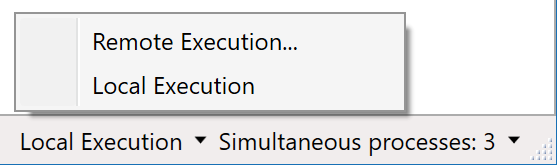
Remote execution can be enabled from the status bar when no jobs are running. See Remote Execution for more details.
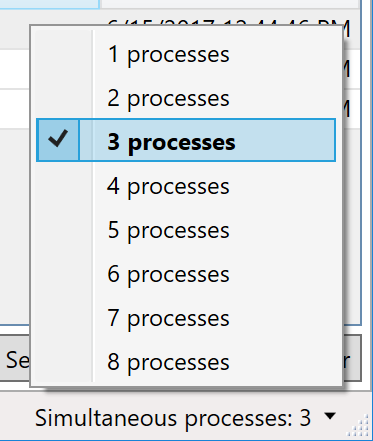
The maximum number of simultaneous processes used by the Job Manager can be adjusted from the status bar when no jobs are running. This defaults to the number of logical processors.
PET Tab
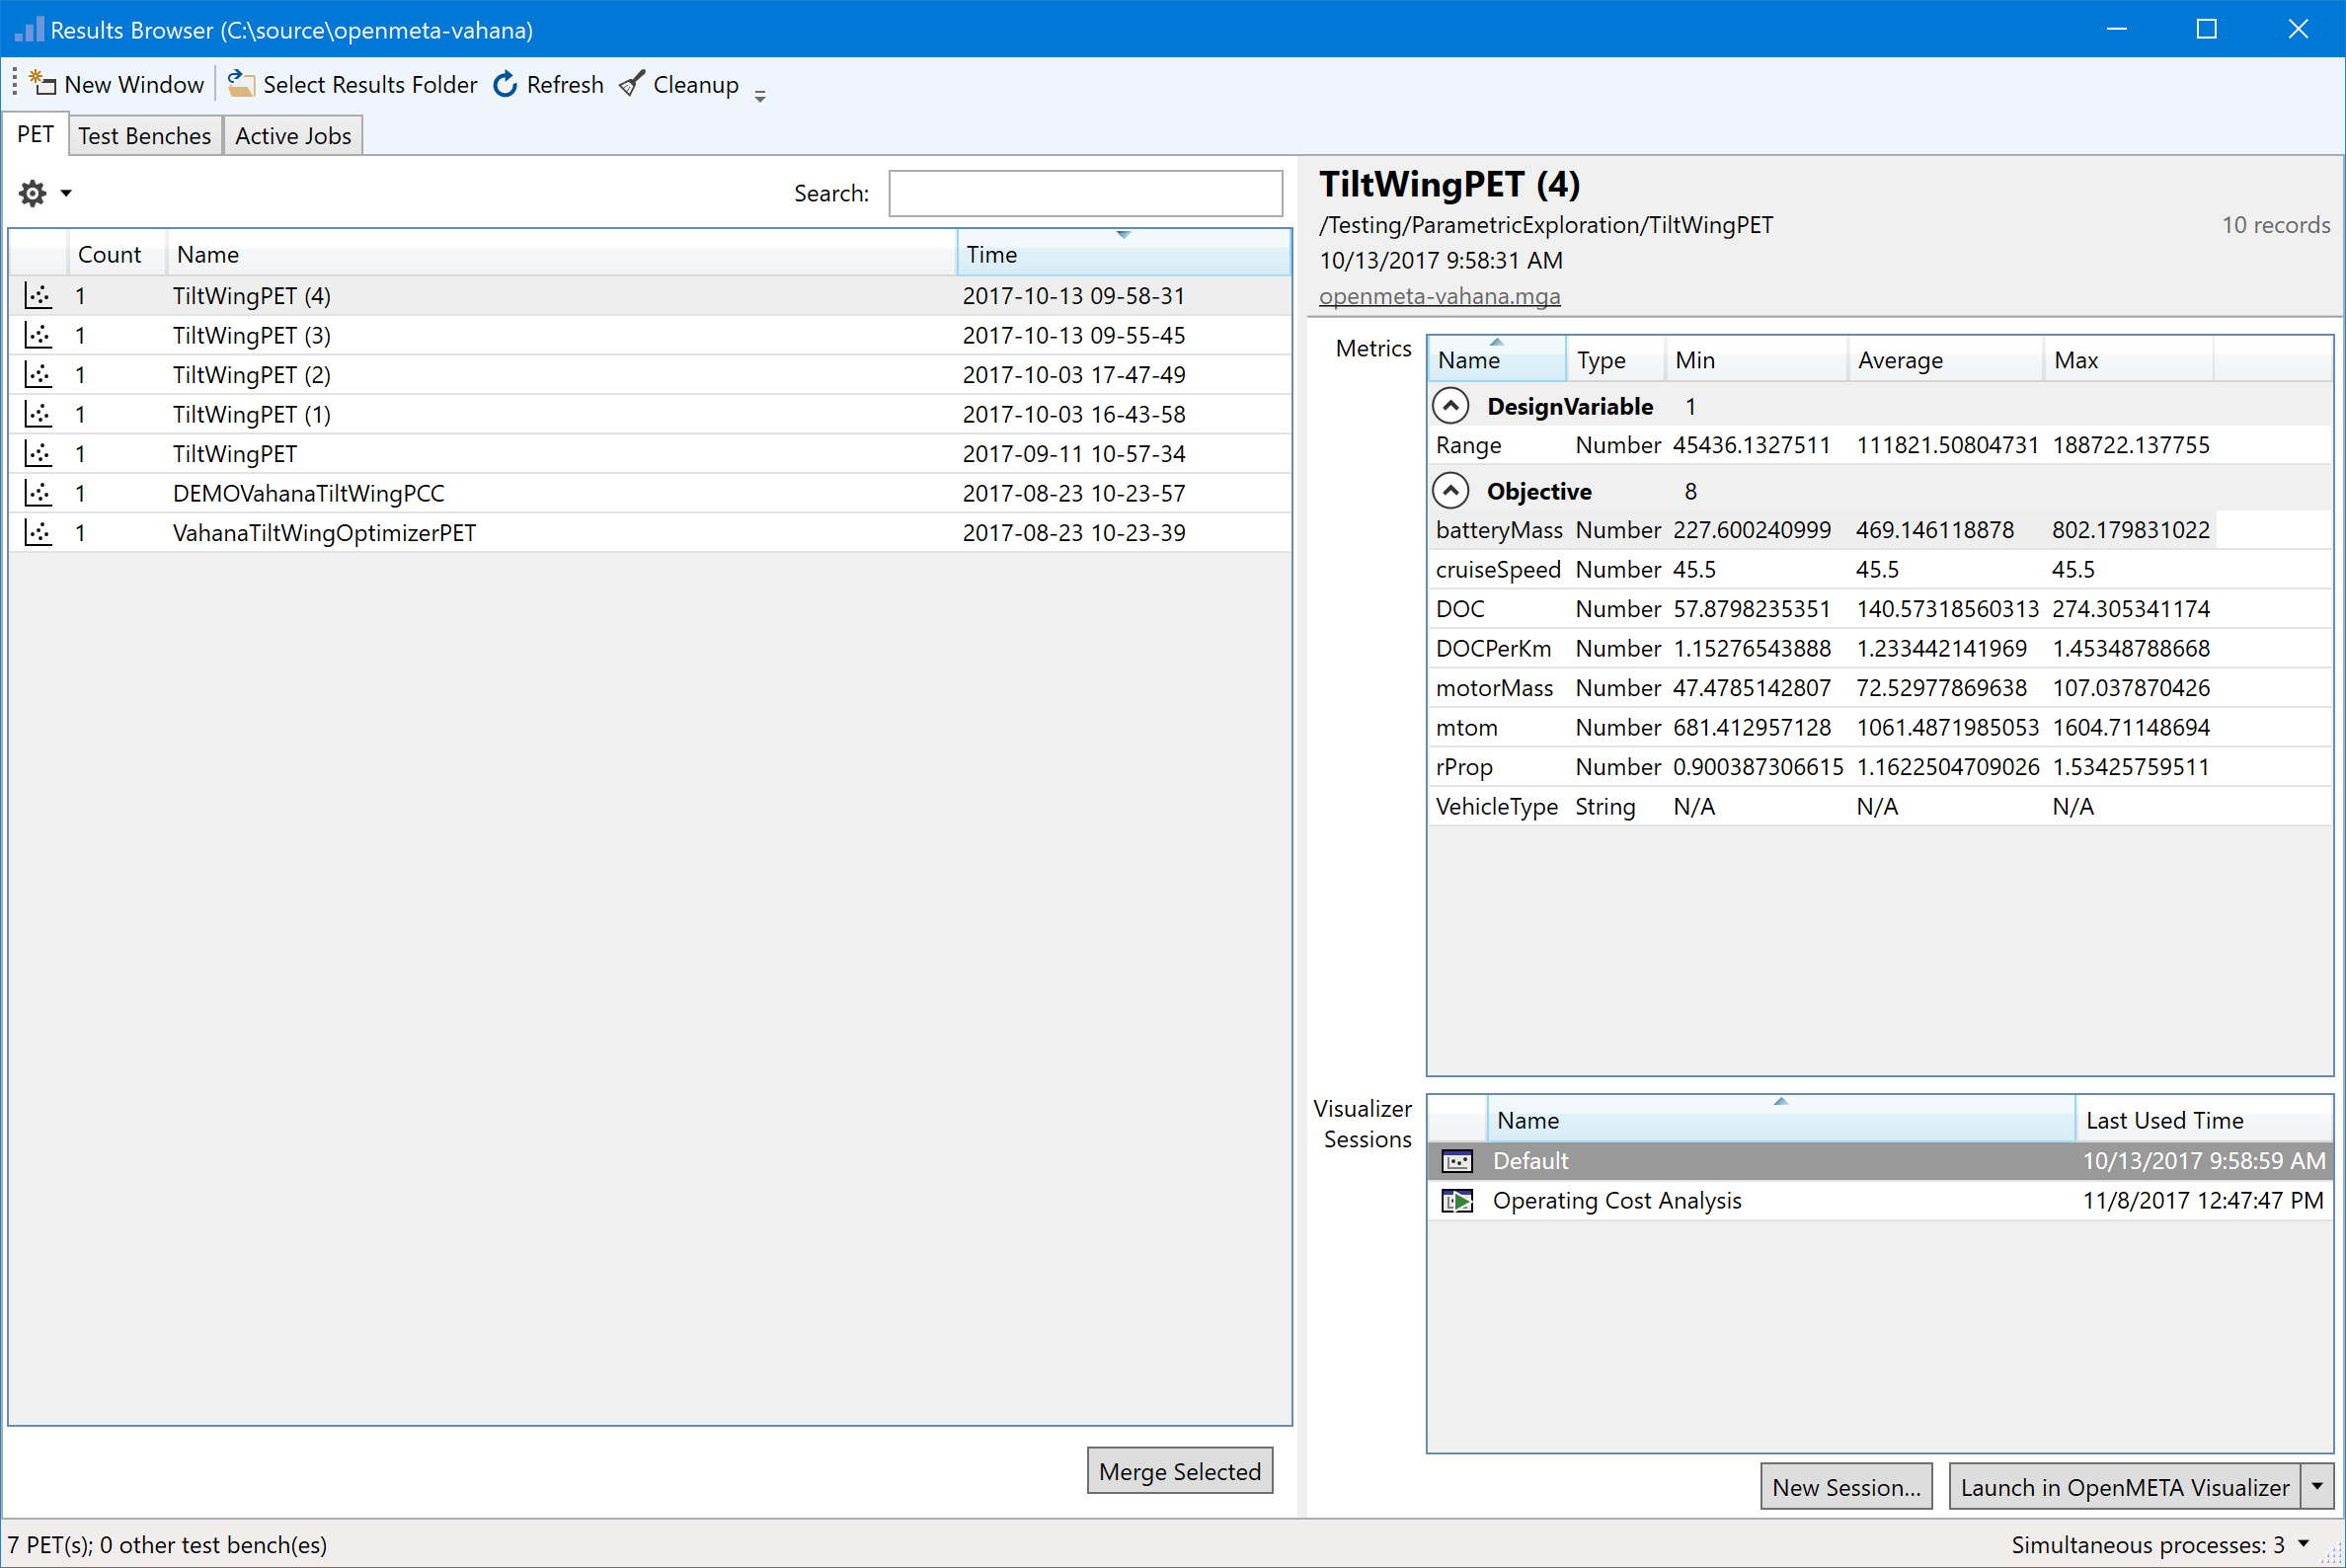
PET Dataset List Pane
This pane on the left of the PET tab shows the available datasets.
Column Headers
Dataset Types:
 PET: These are results from a single execution of the Master
Interpreter within a PET context.
PET: These are results from a single execution of the Master
Interpreter within a PET context. Merged PET: These are results that that were combined
from one or more other result sets, with the Merge Selected button. They may
be refreshed by right-clicking and selecting “Refresh” from the context menu.
Merged PET: These are results that that were combined
from one or more other result sets, with the Merge Selected button. They may
be refreshed by right-clicking and selecting “Refresh” from the context menu. Archive: These are archives of PET Results that were
created with the ‘Archive Selected’ button [deprecated with OpenMETA 0.11] at
the bottom of the PET Dataset Pane. They reside in .csv format in the
./archive folder in the root of the project. Archives must be converted to
the new Merged PET format (using the “Merge Selected” button while the
archive is selected) before they can be launched in the Visualizer.
Archive: These are archives of PET Results that were
created with the ‘Archive Selected’ button [deprecated with OpenMETA 0.11] at
the bottom of the PET Dataset Pane. They reside in .csv format in the
./archive folder in the root of the project. Archives must be converted to
the new Merged PET format (using the “Merge Selected” button while the
archive is selected) before they can be launched in the Visualizer. Legacy PET: These are PET entries created using earlier
versions of the Results Browser, which must be merged (using the “Merge
Selected” button) before they can be launched in the Visualizer. These are
only shown when “Show Legacy PETs” is checked in the Settings
(
Legacy PET: These are PET entries created using earlier
versions of the Results Browser, which must be merged (using the “Merge
Selected” button) before they can be launched in the Visualizer. These are
only shown when “Show Legacy PETs” is checked in the Settings
( ) menu.
Count: This shows the number of discrete configurations that were executed for a given PET. (For an ‘Archive’ or ‘MergedPet’ this will always be 1.)
Name: This is the name of the PET, which is either taken from the PET name in the OpenMETA project, or specified by the user if the result has been renamed or merged.
Time: This is the time at which the PET execution was initiated by the Master Interpreter.
Action Buttons
Merge Selected: This button will merge and archive the selected datasets into a unique folder in the ./merged folder in the project directory that includes a .csv of the aggregated data as well as metadata about the dataset.
Context Menu
Right-clicking a PET or Merged PET will display a context menu:
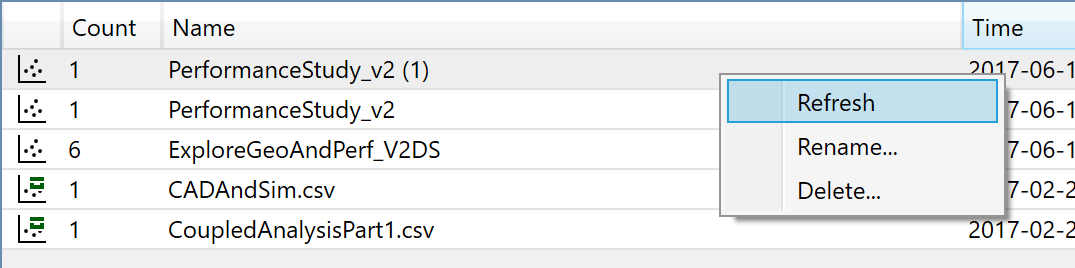
Refresh: Updates the selected dataset to include the latest data from its source datasets.
Rename…: Renames the selected dataset.
Delete…: Deletes the selected dataset.
PET Details Pane
This pane shows details about the currently-highlighted dataset in the PET Dataset Pane. The displayed information in the header includes:
- Name of the PET
- Location of the PET in the OpenMETA project
- Time of execution
- Hyperlink to the project
.mga - Count of the individual points sampled in this PET
- Count of the discrete configurations evaluated
Below the header is a summary of the dataset’s metrics. Each of the DesignVariables and Objectives are listed along with the minimum, average, and maximum values represented in the dataset.
For PETs and Merged PETs, a list of saved Visualizer sessions is also displayed
in this pane. To launch a session, select a session from the list and click
“Launch in OpenMETA Visualizer”; sessions with a  icon
are already running and cannot be launched again (close the browser tab to
relaunch). To create a new session, click “New Session…” and specify a
session name; this will create a new Visualizer session with the default
configuration.
icon
are already running and cannot be launched again (close the browser tab to
relaunch). To create a new session, click “New Session…” and specify a
session name; this will create a new Visualizer session with the default
configuration.
Launching other tools from the Results Browser
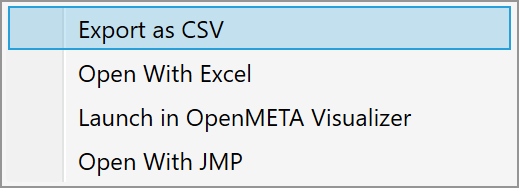
Other external visualization and analysis tools can be launched from the Results Browser by clicking the arrow button beside the “Launch in OpenMETA Visualizer” button and choosing a tool from the dropdown menu.
Exporting results as CSV
To export results as CSV, click the arrow button beside the “Launch in OpenMETA Visualizer” button, choose “Export as CSV”, then select a location to save the exported CSV.
Opening results in Excel
To open results in Excel, click the arrow button beside the “Launch in OpenMETA Visualizer” button and choose “Open in Excel”. A new Excel document will be opened, containing a row for each iteration of your PET and a column for each design variable, objective, constraint, or intermediate variable.
Note
When multiple version of Excel are installed, the Results Browser will
launch the first version it encounters in the %PATH environment
variable.
Opening results in JMP
To open results in JMP, click the arrow button beside the “Launch in OpenMETA Visualizer” button and choose “Open in JMP”. A new JMP Data Table will be opened, containing a row for each iteration of your PET and a column for each design variable, objective, constraint, or intermediate variable.
Test Benches Tab
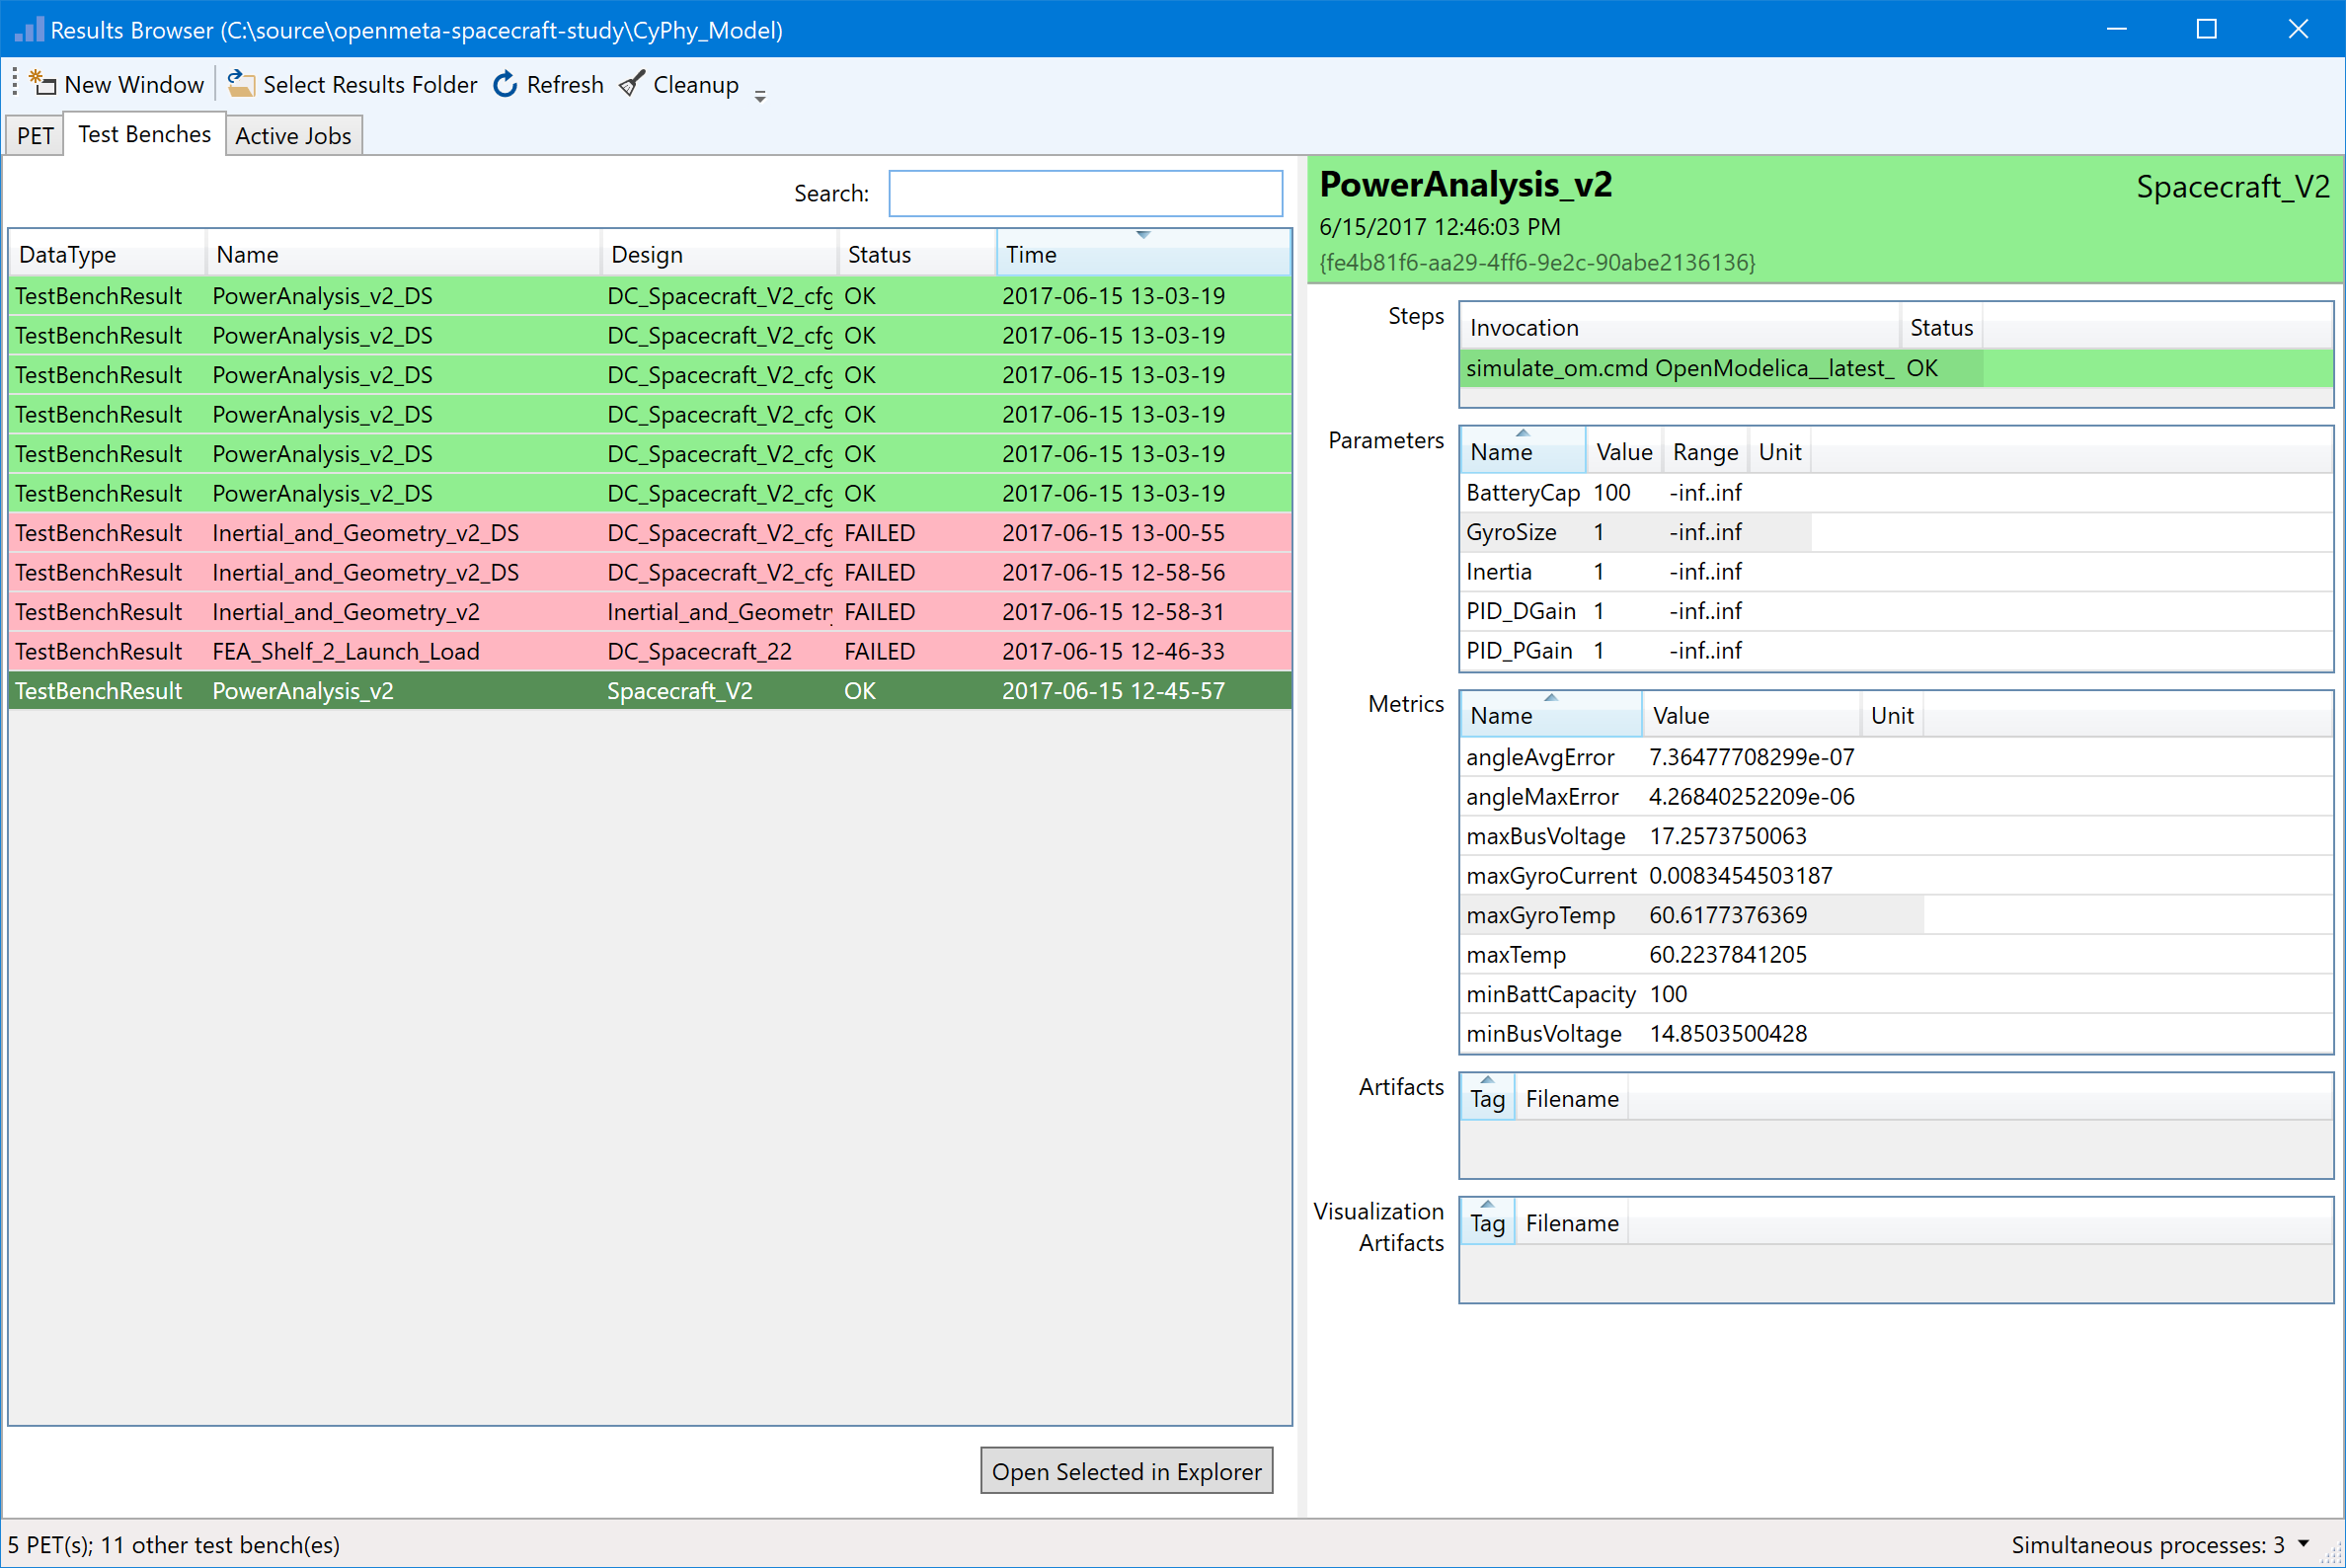
Test Bench List Pane
This pane on the left of the PET tab shows the available Test Benches.
Column Headers
Data Type: ‘TestBenchResult’ is the only type of Test Bench List items.
Name: This name is taken from the OpenMETA project at the time of execution by the Master Interpreter.
Design: This design name is taken from the OpenMETA project at the time of execution by the Master Interpreter.
Status: This is the status taken from the Test Bench Manifest. The possible values are as follows:
- Unexecuted: The job was aborted before it was executed.
- Failed: The job was executed, but an error was encountered.
- OK: The job was executed without errors.
Time: This is the time at which the Test Bench execution was initiated by the Master Interpreter.
Action Buttons
Open Selected in Explorer: This button will open Windows Explorer at the location of the execution directory for this Test Bench.
Test Bench Details Pane
This pane shows details about the currently-highlighted dataset in the PET Dataset Pane. The displayed information in the header includes:
- Name of the Testbench
- Time of execution
- Design ID
- Design Name
Below the header is a summary of the Test Bench. Each of the five
sections provides information that is encoded in the
testbench_manifest.json file.
- Steps: An ordered list of the commands to be invoked for the execution of this Test Bench.
- Parameters: The input parameters of the Test Bench, including their value, range, and units.
- Metrics: The output metrics that resulted from the execution of the Test Bench, including their value and units.
- Artifacts: A list of recorded artifacts from the Test Bench execution.
- Visualization Artifacts: A list of the recorded visual artifacts from the Test Bench execution.
Active Jobs Tab
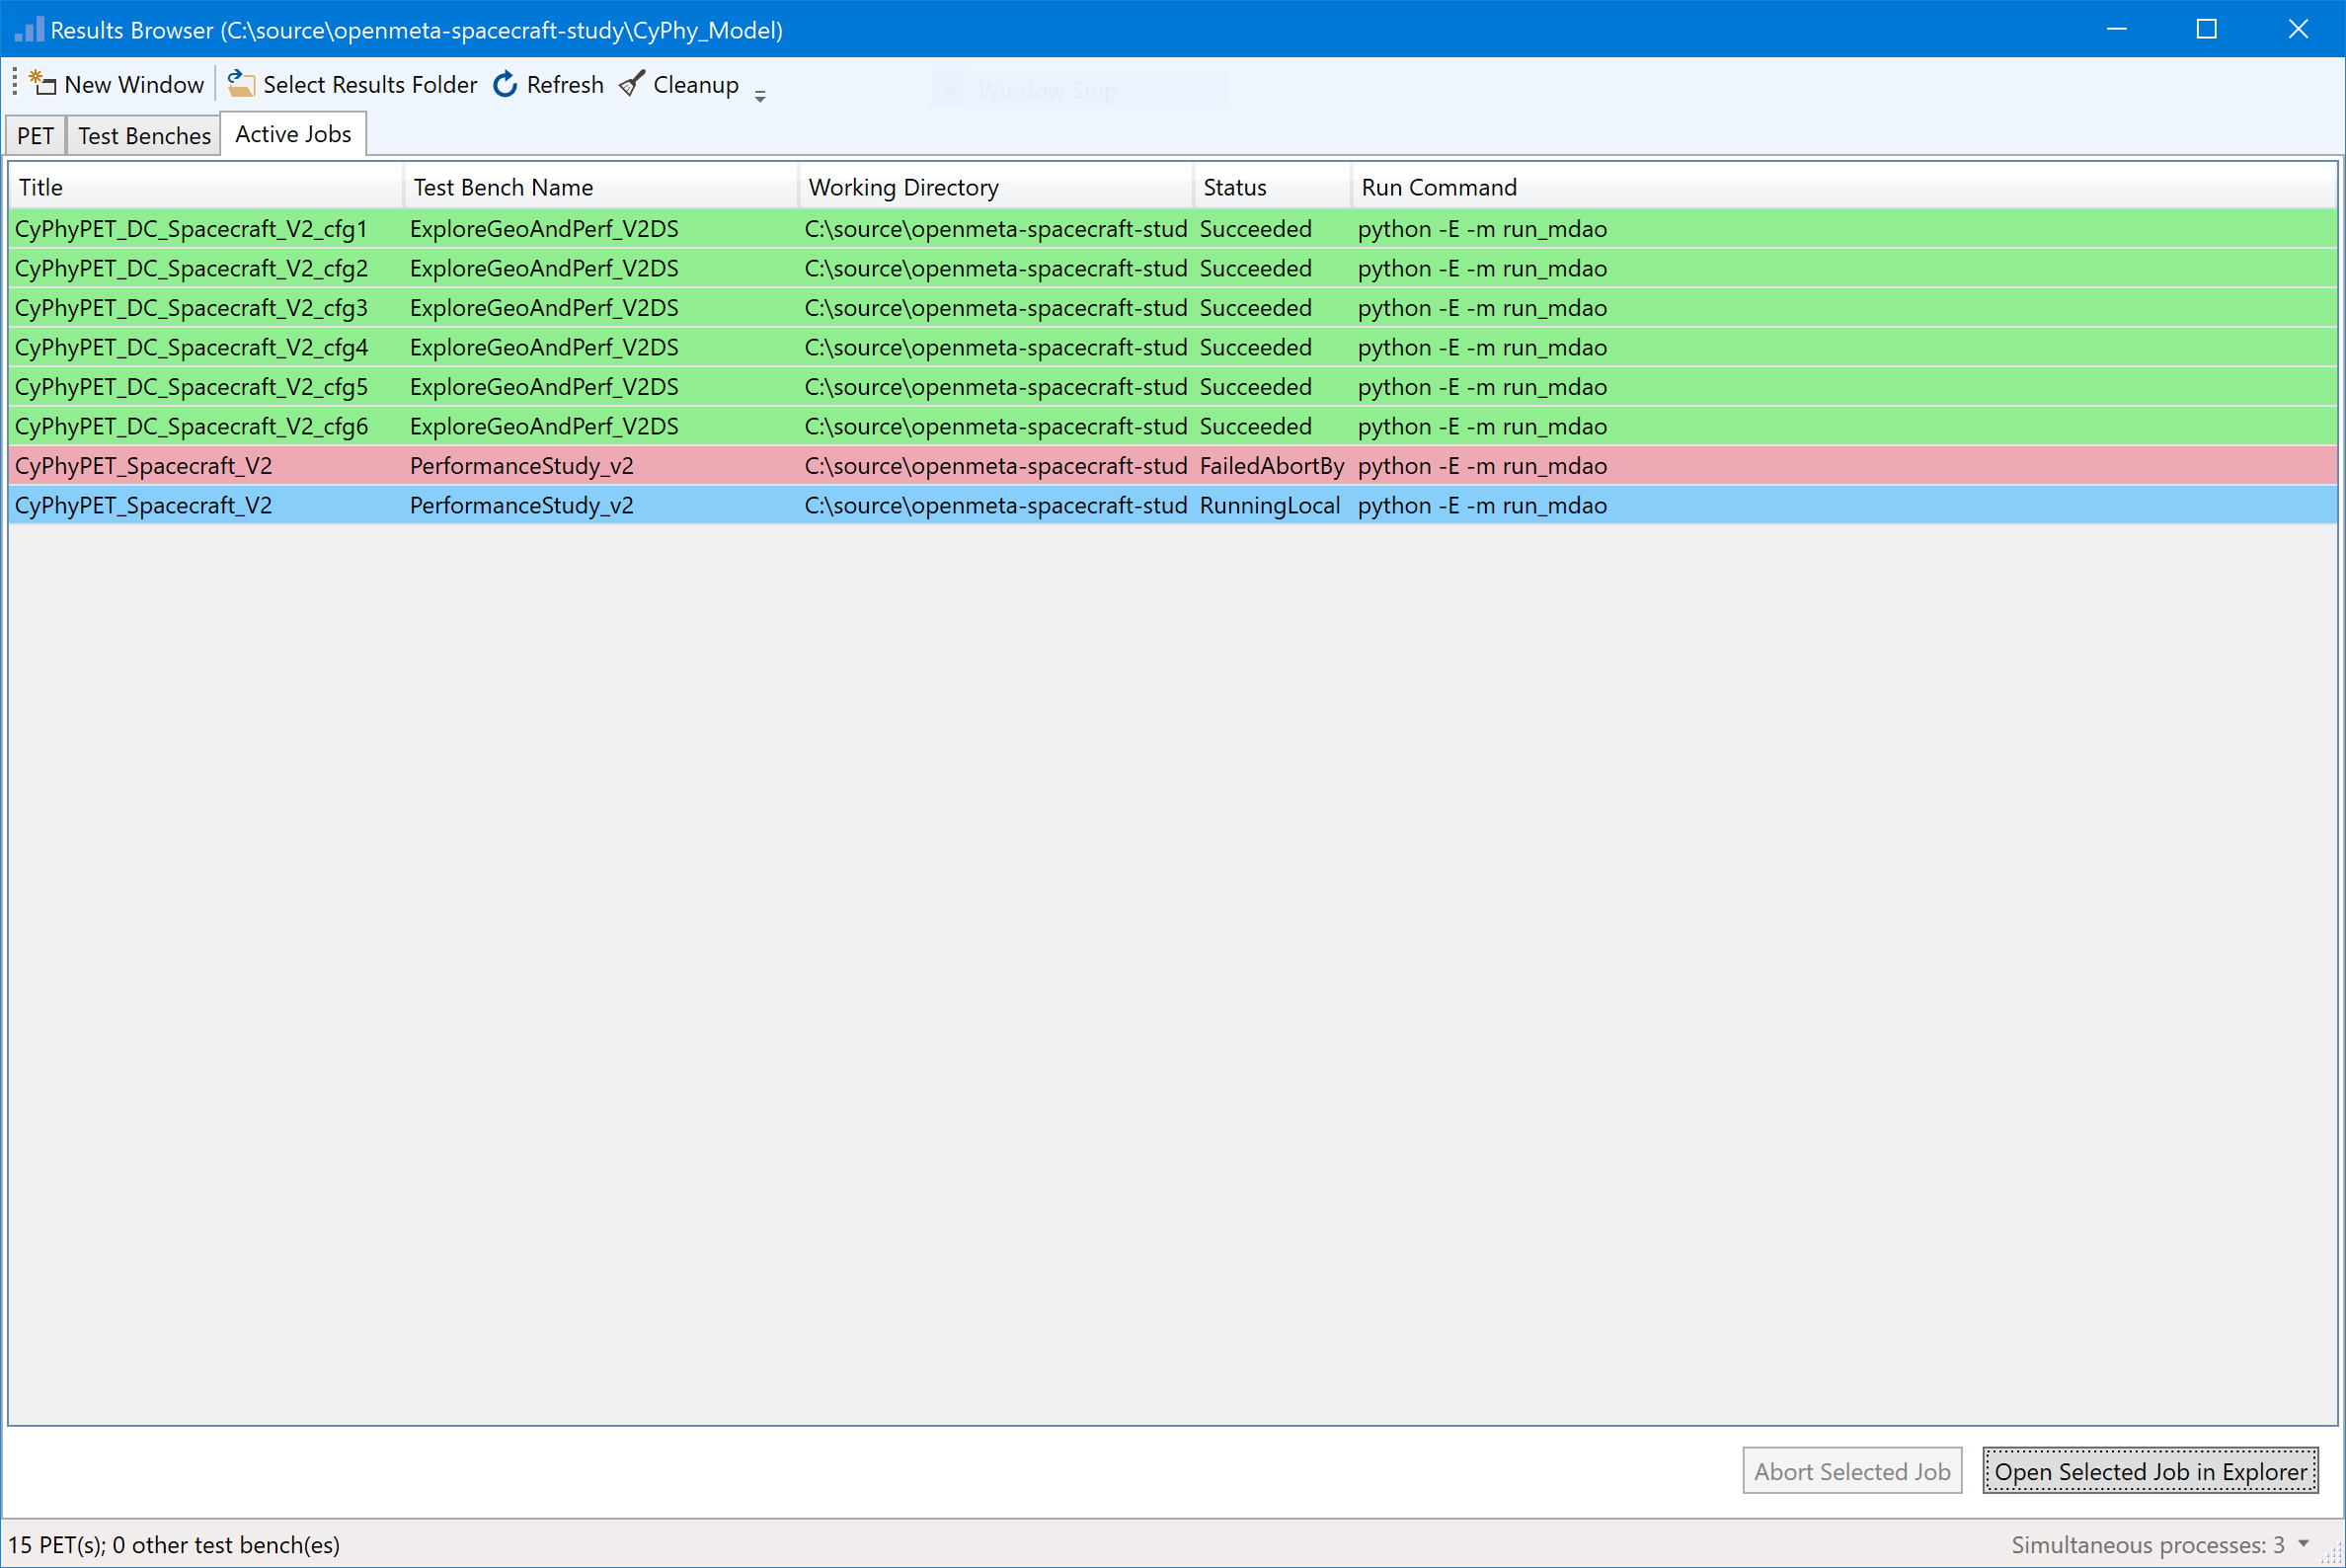
Active Jobs List Pane
This pane lists all the active jobs.
Column Headers
Title: The title of the job, as generated at the time of execution by the Master Interpreter.
Test Bench Name: This name is taken from the OpenMETA project at the time of execution by the Master Interpreter.
Working Directory: This the directory that the job is executing or was executed in. You can open this directory by right-clicking a job and selecting ‘Open in Explorer’ or by highlighting the job and clicking ‘Open Selected Job in Explorer.’
Status: This is the current status of the job, according to the Job Manager. The possible values are as follows:
- Succeeded: The job was executed and finished without errors.
- Failed: The job was executed, but the job was aborted or an error was encountered.
- Running: The job is currently being executed.
- In Queue: The job is waiting to be executed because the maximum number of simultaneous jobs has already been met.
Run Command: This is the command that is called by the job executor to invoke the job.
Action Buttons
Abort Selected Job: This button will kill the selected job.
Open Selected Job in Explorer: This button will open Windows Explorer at the location of the execution directory for the highlighted job.
Remote Execution
Remote execution of OpenMETA jobs is available if the OpenMETA Remote Execution Server is installed on a remote machine.
Setting up a Server
The OpenMETA Remote Executor Server is not currently shipped with public releases of OpenMETA. If you are interested in this feature of OpenMETA, please contact us for more information by visiting the Contact page of the MetaMorph website.
Establishing a Server Connection
To switch to remote execution, click the “Local Execution” dropdown on the status bar, and select “Remote Execution…” from the menu.
In the dialog that appears, enter the URL for the remote execution server as well as your username and password for the remote execution server (given to you by the server administrator) and click “OK”. All jobs will then be executed remotely rather than locally.
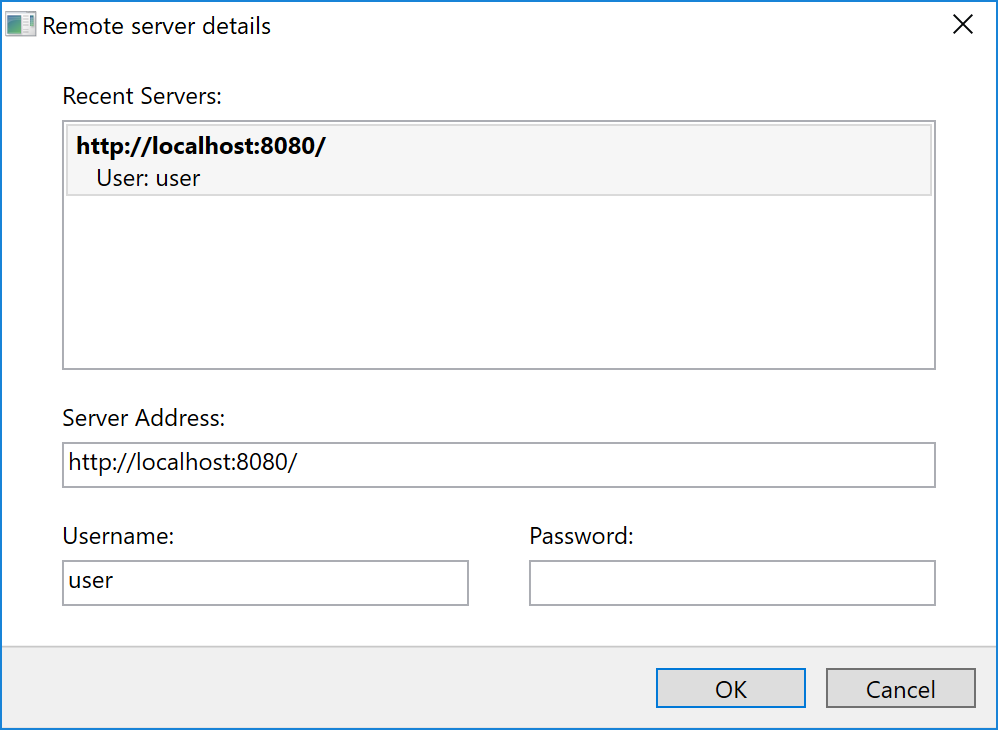
Although the passwords are not stored for security reasons, a list of Recent Servers is saved for ease of reconnection.

To return to local execution, click the “Remote Execution” dropdown on the status bar, then select “Local execution” from the menu.
Job Distribution
When the Results Browser is configured to run jobs under remote execution, the jobs’ labels are then used by the server to distribute each job to a suitable worker machine. See the Job Labels subsection of the Test Benches chapter for more information.
Remote Job Statuses
Jobs executing remotely have the following additional statuses:
- Succeeded: The job was executed and finished without errors.
- Failed: The job was executed, but the job was aborted or an error was encountered.
- Running: The job is currently being executed.
- In Queue: The job is waiting to be executed because the maximum number of simultaneous jobs has already been met.