OpenMETA Projects
An OpenMETA Project comprises an OpenMETA project file and a number of associated folders. Since the relative location of all the items must stay constant throughout the life of the project, it is customary to create a separate folder for each project.
Project Folder Structure
In the figure below, you can see what a typical OpenMETA project directory looks like.

A Typical OpenMETA Project Directory
OpenMETA Project Files
Both the docs.mga and docs.xme files store the project data in its
entirety. The difference between these two formats is described in the
Project File Extensions section below. Essentially, every object that is
included in the GME Browser has a representation in this file.
Components Folder
The components folder is the second key component of an OpenMETA project
directory. This folder includes the resources associated with all the components
that are included in the OpenMETA Project. In the model file, each component has
a reference that points to a subfolder in the components folder. These
folders can be renamed, but this action is best done from within GME by
adjusting the Path attribute of the component in the Object Inspector.
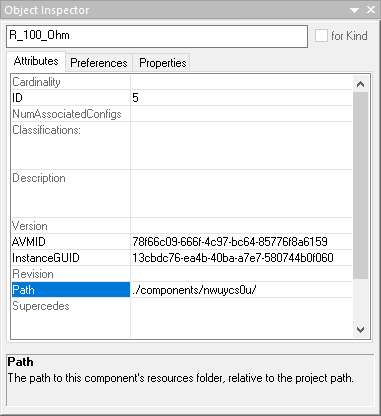
Properly Renaming an OpenMETA Component Resource Folder
Note
It is often necessary to navigate to the resource folder for a given component. The simplest way to do so is to:
- Open the component.
- Click the Component Authoring Tool (CAT) Button,
 .
. - Doubl-click the Open Component Folder icon in the CAT Dialog Window.
Results and Merged Folders
After you begin executing analysis in an OpenMETA project, a results folder
will be created in your project directory. This folder is where all executable
analyses are placed when they are generated from the OpenMETA tools.
Similarly, when you start to explore results using the Results Browser
and Visualizer, a merged folder will be created that will include
collections of data that are being explored.
Project File Extensions
.mga
The native storage format for OpenMETA projects is the .mga file. This
format is a binary format and therefore usually the smaller of the two formats.
When you are editing an OpenMETA project in GME and click or hit Control-S on the keyboard, this is the format that is
saved.
.xme
The .xme format is an XML-based format that human-readable. This type,
although larger, lends itself much better to version control as discussed in the
next section. To save your project in the .xme format, you need to click
.
Collaboration
Given the complexity and cross-disciplinary nature of the systems modeled in OpenMETA, it is common for more than one user to be developing a model simultaneously. To address this use case we describe two separate, though not mutually exclusive, solutions below for dealing with the management of an OpenMETA Project.
Version Control System
Using a Version Control System with OpenMETA is an easy way to save versions of an OpenMETA project as it develops. This can be especially useful as the modeled system evolves through the life cycle stages. Throughout this section we describe the best practices for sharing an OpenMETA project using the Git version control system, but these principles should apply to any version control system that is used.
What to Check In
Given the complexity of the project, it may only be necessary to track changes
to the project file itself. For this purpose we suggest you check in the
.xme format of the OpenMETA project. Using this format allows Git to easily
recognize the difference between subsequent revisions and efficiently store the
history.
We recommend saving your project often in the native format, and exporting to the XML format only when you are ready to commit some changes. Likewise, it is good practice to re-import a project before you begin to make changes to the model to minimize the chance of including unwanted changes. This can be done by:
- Closing the project.
- Clicking .
- Selecting the
.xmeversion of the project. - Replacing the current
.mgawith the opened.xmeby clicking Yes when asked to replace the current project.
.gitignore File
As you continue to work with an OpenMETA project, many files will be generated
in the project directory. It is not useful to check in these files as they can
always be regenerated using the model itself as desired. Generating a
.gitignore file in the root of your project directory can be a useful way to
ensure that you are only checking in necessary files to your repository. For
example, the following file prevents the log, merged, results,
requirements, and design-spaces directories from being checked in.
log/
merged/
results/
requirements/
design-spaces/
This could be used as a starting point for building a .gitignore file that
suits the needs of a specific project.
Branching and Merging
Git offers the ability to create branches where there are two diverging
versions of an entity that are eventually going to be merged back into a
single version; however, merging .xme files is often very difficult and
sometimes virtually impossible to accomplish.
For this reason we only suggest branching when you want to experiment with some change or feature and simply replace the original version if successful.
SubTree Merge
SubTree Merge is one of the Utility Interpreters included with OpenMETA. This utility makes it possible for two or more users to collaborate on an OpenMETA project. Collaborators can work within designated subtrees, and their edits can be re-incorporated into a master copy of the design model.
In this subsection, we refer to a component assembly, and all of the objects contained within, as a subtree. See the Component Assemblies chapter for more details on component assemblies.
Workflow
Using this method for collaboration requires identifying ways to logically divide your model. For example, consider a design with this hierarchy:
- Module_Design
- ARA_Standard_Interface
- EPM_Subsystem
- MIPI_FPGA_Gateway
- Microcontroller
- Atmega168_Subsystem
- Display_Circuit
- Temperature_Sensing
- Amp1
- Amp2
- ARA_Standard_Interface
Two designers decide to divide their work, with one collaborator editing the Temperature_Sensing subtree and the other collaborator continuing work in other areas.
They first make a copy of the modeling project, designating one copy the “master” and the other the “secondary”. In the “secondary” model, one collaborator will make edits only within the Temperature_Sensing subtree. The other collaborator may make edits in any other area using the “master” model.
When the collaborators want to merge work from the “secondary” model back into
the “master” model, they first open the “master” model. They open the
Temperature_Sensing component assembly in the editing window, and click on
the Subtree Merge utility, ![]() . They select the
“secondary” model’s
. They select the
“secondary” model’s .mga file, and the Subtree Merge utility extracts
that model’s version of the subtree, replacing the original in the “master”
model. Their independent work has now been fully merged into a single design
project.
This process can be followed with any number of “secondary” models, provided that no two models contain edits within the same subtree.
Limitations
Once the two models are split, you are unable to make changes to the subtree in the “master” model until the models are merged again. Because the Subtree Merge creates an exact copy of the data found in the “secondary” model’s version of the subtree, those changes to the “master” model’s copy of the subtree will be wiped out.
If any components are added to the “secondary” model project and used in the subtree, then those components must be imported into the “master” model before the Subtree Merge is performed.
Illustrated Example
Designs updated by collaborators can be re-incorporated into designs. The procedure to update the design in your project is as follows:
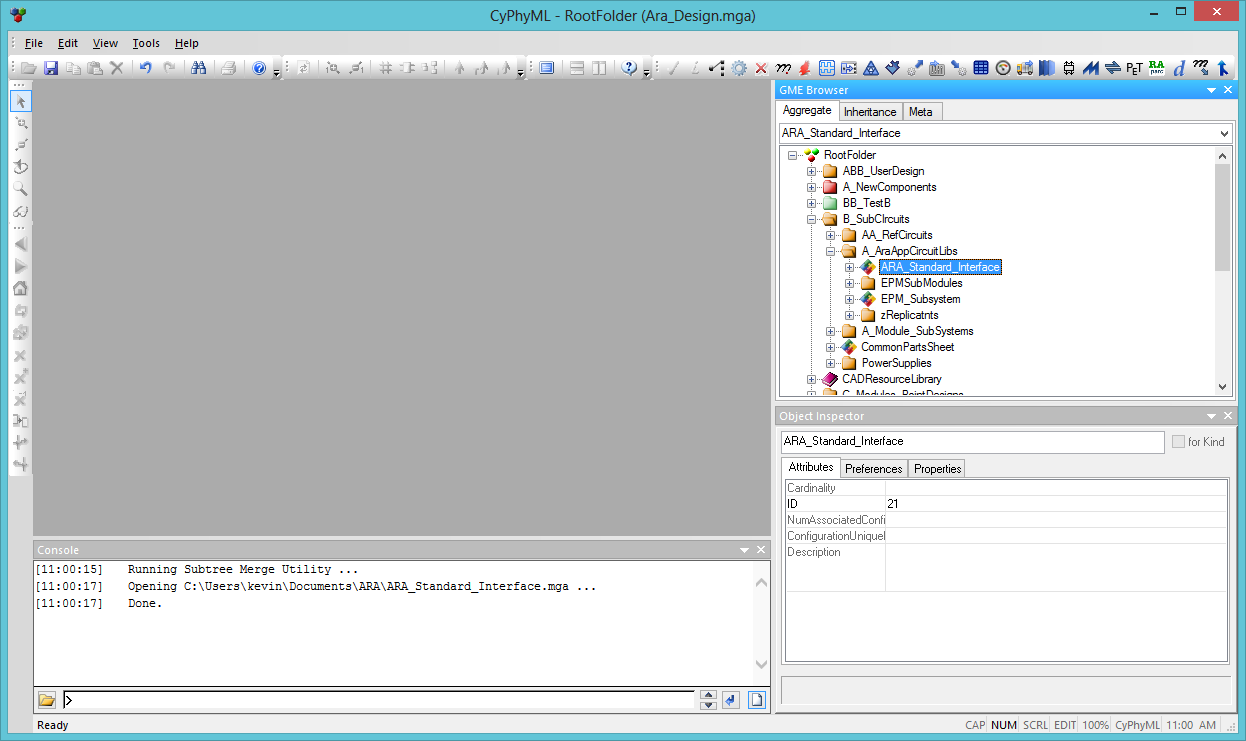
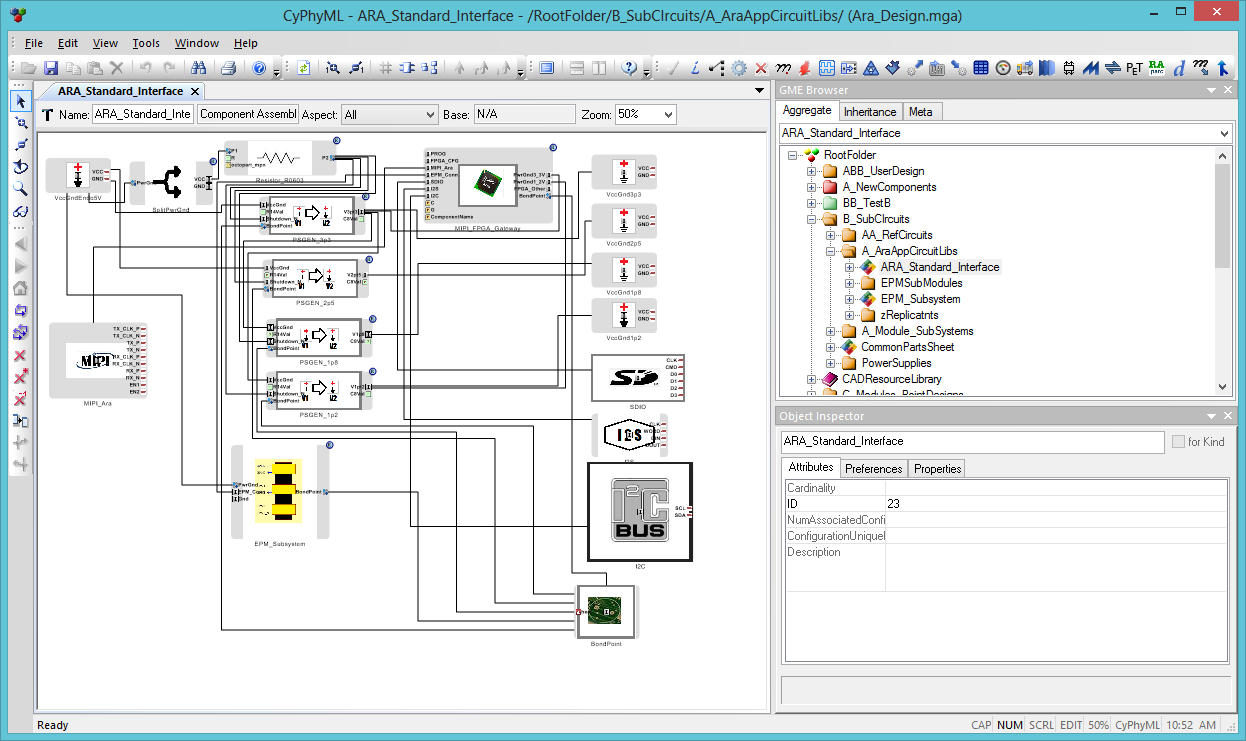
First, open the design you’d like to update. Here, we’ll update the ARA Standard Interface.
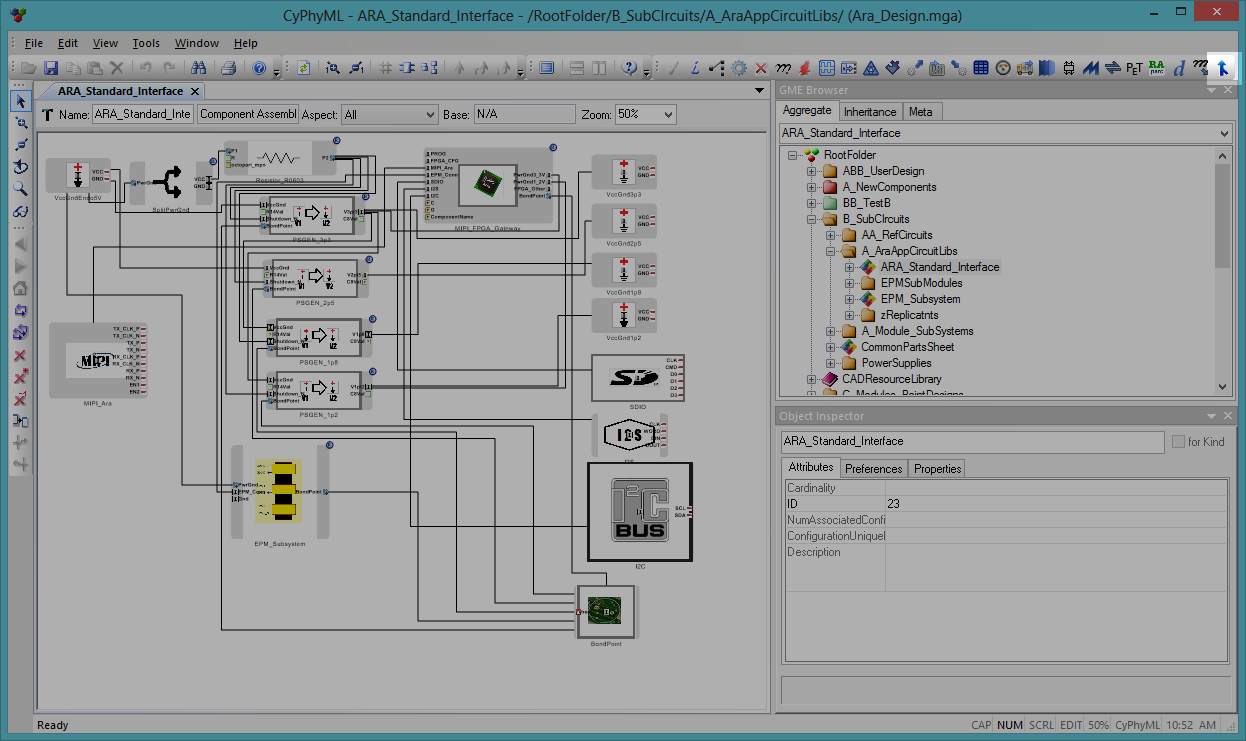
Then click on the SubTree Merge interpreter.
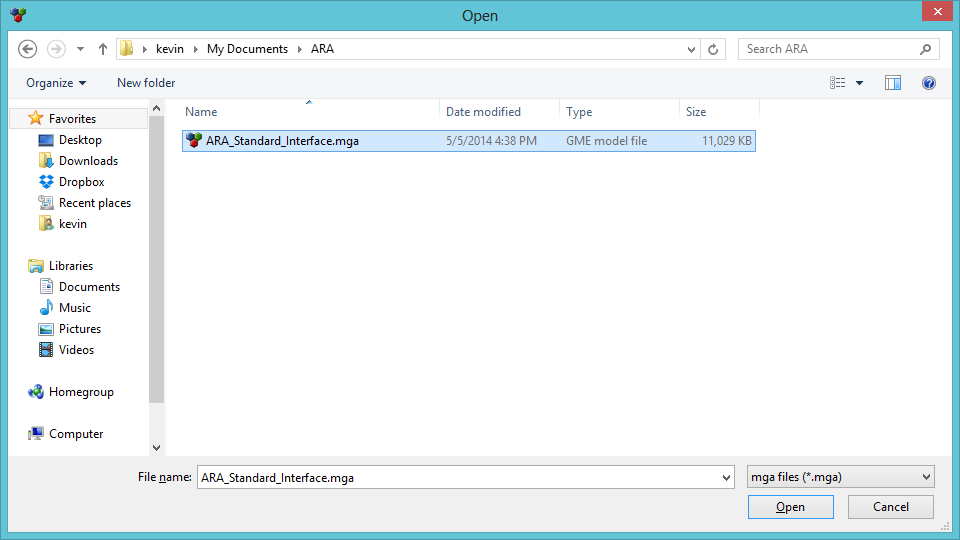
Select the .mga file that contains the updated ARA Standard Interface.
The SubTree Merge interpreter will replace the ARA Standard Interface, and should report success in the GME Console.