Analyzing Our Company
A model of our team is not very useful unless we have a way to execute operations on the model to generate meaningful and significant results. In OpenMETA, Test Benches are used to transform a model to new representations, generate simulation code, and calculate metrics.
For the given exercise, we would like to calculate some meaningful metrics about our team.
Creating a Test Bench
Let’s add a Test Bench to our project.
- Right-click on the RootFolder in the GME Browser and choose .
- Right-click on the resulting Testing folder and choose .
- Rename this new Test Bench AnalyzeMyTeam.
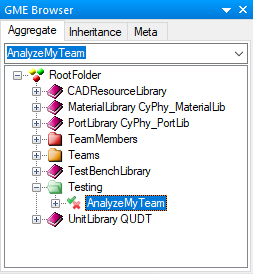
The GME Browser should now look like this:
Adding Our Team
Let’s specify the MyTeam Component Assembly as the System Under Test.
- Double-click the AnalyzeMyTeam Test Bench from the GME Browser to open it in the canvas window.
- Right-click and drag the MyTeam Component Assembly from the GME Browser onto the canvas.
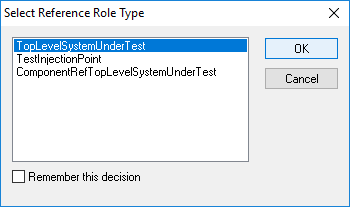
- Select Create reference.
- Select TopLevelSystemUnderTest and click OK.
Adding the Workflow
Workflows are used to define the steps that should be carried out when a Test Bench is executed. We will have to create a workflow defining what the test bench should do when executed and then add it to our Test Bench.
In the GME Browser, right-click on the Testing folder and choose .
Right-click on the resulting WorkflowDefinitions Folder and choose .
Rename the workflow ValueAggregator.
Double-click the workflow to open it in the canvas window.
Drag a Task from the Parts Browser onto the canvas.
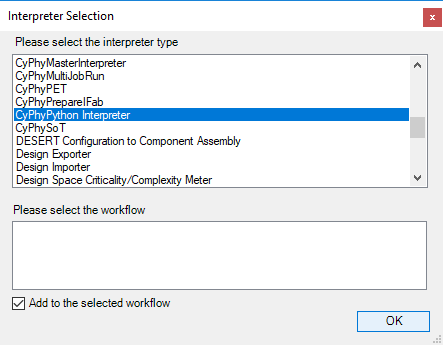
Select the CyPhyPython Interpreter.
Double-click the resulting Task.
In the dialog that appears enter
bin/ValueAggregator.pyin the script_file field.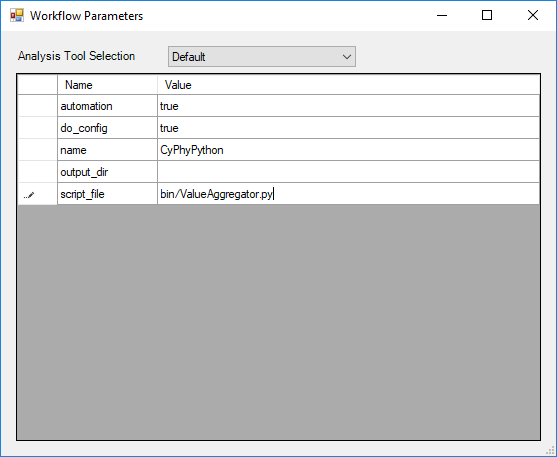
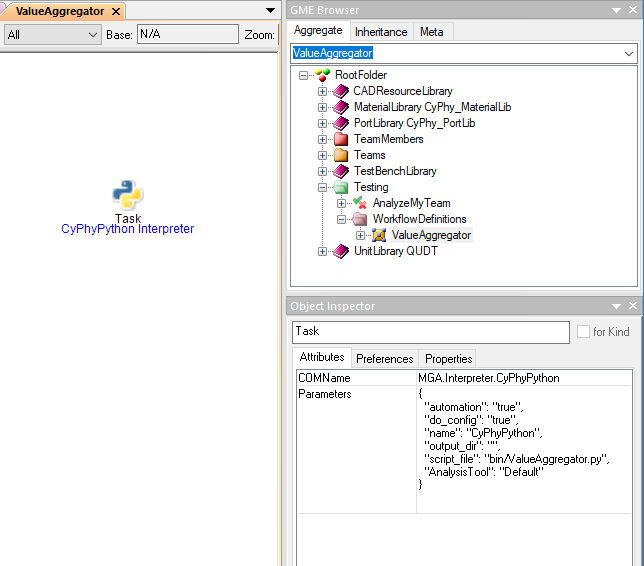
Your workflow should now look something like this:
Let’s finish by adding this workflow to our Test Bench.
- Open the Test Bench in the canvas by locating and double-clicking it in the GME Browser.
- Right-click and drag the new ValueAggregator Workflow onto the canvas and choose Create reference.
Adding Our Queries
The Value Aggregator that we added in the previous steps is a script included with the OpenMETA tools that allows us to easily query and extract values from the model we’ve constructed. We will use this tool to calculate the team’s salary and average tenure with our company.
The Value Aggregator script visits each of the properties in the Test Bench and performs the query defined in the Description attribute. Then it assigns values to each Metric based on the equation defined in its Description attribute. We will create two queries and metrics.
From the Parts Browser drag a Property into the AnalyzeMyTeam canvas.
Rename the Property SalarySum.
In the Object Inspector enter
Salary,*,SUMinto the Description attribute.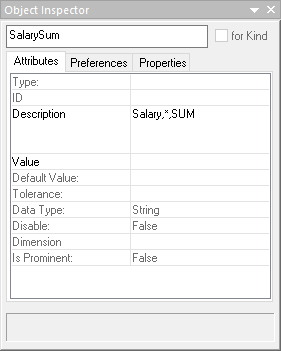
Create a second Property named YearsEmployedAverage and enter
YearsEmployed,*,AVERAGEinto the Description attribute.From the Parts Browser drag a Metric into the AnalyzeMyTeam canvas.
Rename the Metric TeamSalary.
In the Object Inspector enter
TeamSalary = SalarySuminto the Description attribute.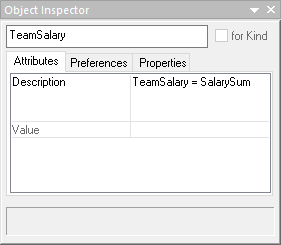
Create a second Metric named AverageTeamTenure and enter
AverageTeamTenure = YearsEmployedAverageinto the Description attribute.
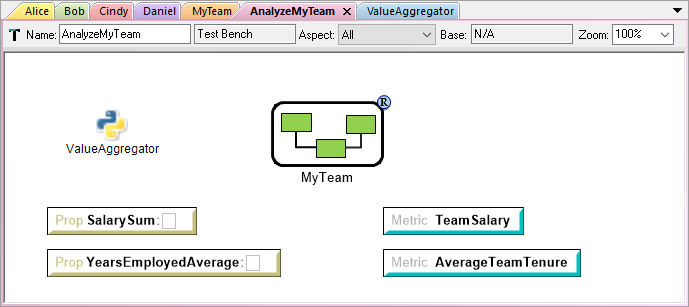
Your finished Test Bench should look something like this:
Running Our Analysis
The only thing left to do it run our newly-created Test Bench using the Master Interpreter.
- While the AnalyzeMyTeam Test Bench is open in the canvas, click the
Master Interpreter button,
 , on the toolbar.
 - Click OK when the dialog appears.
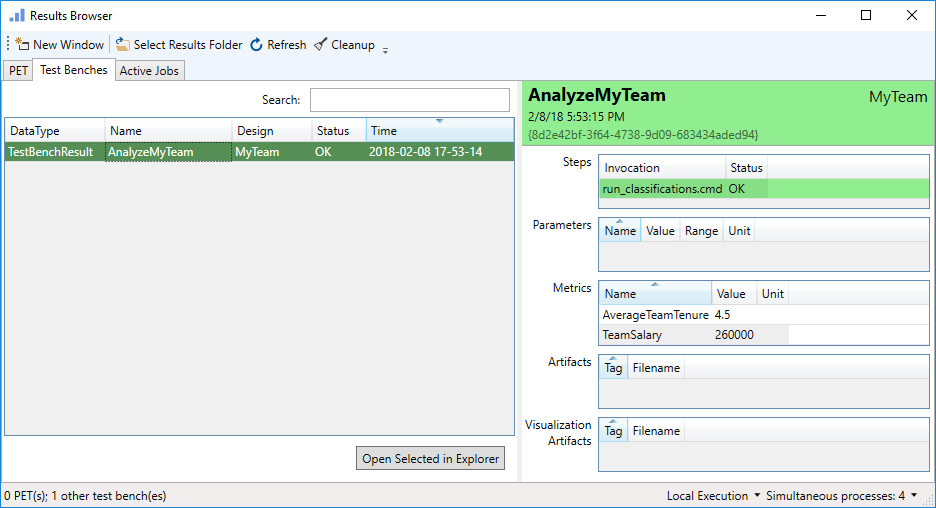
This will send the job to the Results Browser for execution. When the job completes and turns green, navigate to the Test Benches tab to see the results of the job. Your results should look something like this: